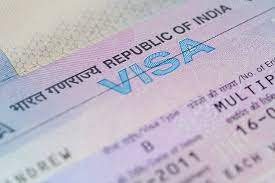
How To Apply For Indian Visa For Surinamese And Emaswati Citizens:
How to apply for Indian visa for Surinamese and Emaswati citizens:
- Determine the type of visa you need:
- Research the different types of visas available for your purpose of travel.
- Consider factors such as duration of stay, purpose of visit, and entry requirements.
- Gather the required documents:
- Obtain a valid passport with at least six months of validity remaining.
- Prepare recent passport-sized photographs.
- Collect supporting documents such as invitation letters, travel itineraries, or hotel reservations.
- Fill out the visa application form accurately and completely.
- Schedule an appointment:
- Visit the official website of the Indian embassy or consulate in your country.
- Find the section for visa application and appointment scheduling.
- Choose a convenient date and time for your appointment.
- Attend the appointment:
- Arrive at the embassy or consulate on time.
- Bring all the required documents and the visa application form.
- Submit your application and pay the visa fee.
- Provide any additional information or answer any questions asked by the consular officer.
- Track your application status:
- After submitting your application, you will receive a receipt with a tracking number.
- Use this tracking number to check the status of your application online.
- Be patient, as the processing time may vary.
- Collect your visa:
- Once your application is approved, you will be notified to collect your visa.
- Visit the embassy or consulate during the designated collection hours.
- Bring the receipt and any additional documents requested.
- Pay any remaining fees, if applicable.
- Receive your visa and double-check the details for accuracy.
Remember to follow all the instructions provided by the Indian embassy or consulate and ensure that you have all the necessary documents before applying. Good luck with your Indian visa application!
Key Takeaways
- Research common interview questions and practice answers to be well-prepared for the visa interview.
- Gather all required documents, including passport, application form, and supporting documents, to bring to the interview.
- Familiarize yourself with the visa requirements and understand the purpose of your visit to India.
- Utilize the online tracking system provided by the embassy or consulate to stay updated on the status of your visa application.
Determine the Type of Visa You Need
To make your dream trip to India a reality, you need to figure out which type of visa you’ll need, so you can start planning your incredible adventure! As a Surinamese or Emaswati citizen, it’s important to understand the different types of Indian visas available to you and their specific requirements.
For Surinamese and Emaswati citizens, the most common types of Indian visas are tourist visas, business visas, and medical visas. If you’re planning to visit India for sightseeing, visiting friends or family, or participating in recreational activities, a tourist visa is the way to go. On the other hand, if you’re traveling to India for business-related purposes such as attending conferences, meetings, or establishing business connections, a business visa is what you’ll need. Lastly, if you require medical treatment in India, you’ll need to apply for a medical visa.
When applying for any of these visas, you’ll need to meet certain requirements. The Indian government requires all Surinamese and Emaswati citizens to have a valid passport with at least six months of remaining validity. Additionally, you’ll need to provide two recent passport-sized photographs, a completed visa application form, and proof of travel arrangements such as flight tickets or itinerary. It’s also crucial to have sufficient funds to cover your expenses during your stay in India and a letter stating the purpose of your visit.
Now that you understand the different types of Indian visas and their requirements, it’s time to gather the required documents.
Gather the Required Documents
Collecting all the necessary documents for your visa application is crucial for a smooth and successful process. Here are some tips to help you gather the required documents efficiently:
- First and foremost, make sure you have a valid passport with at least six months of validity remaining. Photocopy the passport’s information page and any previous Indian visas you have obtained.
- Next, obtain two recent passport-sized photographs with a white background. Follow the specified dimensions and guidelines for the photographs.
- Gather supporting documents such as proof of residence, like a utility bill or rental agreement, to establish your ties to your home country. Also, provide proof of travel arrangements, such as flight itineraries or hotel reservations.
- For business or employment-related visits, obtain an invitation letter from the Indian company or organization you will be visiting. This letter should include details about the purpose and duration of your visit.
- Lastly, accurately and completely fill out the online application form. Double-check all the information before submitting it.
Collecting and organizing all the necessary documents will greatly facilitate the visa application process. Once you have gathered everything, you can move on to filling out the online application form.
Fill Out the Online Application Form
Once you’ve gathered all the necessary documents, it’s time to start filling out the online application form for your Indian visa. This step is crucial and requires attention to detail. To make the process easier for you, here are some common mistakes to avoid and a few tips and tricks to keep in mind.
Common mistakes that applicants often make when filling out the online application form include providing incorrect information, such as misspelled names or wrong dates of birth. Make sure to double-check all the details before submitting the form to avoid any complications later on. Another common mistake is not providing all the required information. Ensure that you fill out all the mandatory fields and attach the necessary documents as specified in the guidelines.
Here are a few tips and tricks to help you navigate through the application process smoothly. Firstly, make sure to have all the required documents readily available before starting the form. This will save you time and prevent any last-minute stress. Secondly, be cautious when selecting your visa type and duration. Choose the most appropriate option based on the purpose of your visit and the length of your stay.
Lastly, take your time while filling out the form. Pay attention to every question and provide accurate information. Remember, any mistakes or discrepancies may lead to delays or even rejection of your visa application.
Once you have successfully completed the online application form and submitted it, you can move on to the next step of paying the visa fee. This will be discussed in the subsequent section.
Pay the Visa Fee
Paying the visa fee is an essential step in the application process that ensures your submission is complete and ready for processing. To make the payment, you have different payment methods at your disposal. The Indian government accepts online payment through credit or debit cards, as well as other online payment platforms.
Additionally, you can also pay the fee through a bank transfer or by depositing cash at the designated bank. It is crucial to keep in mind that the visa fee is non-refundable, so make sure to double-check all the details before proceeding with the payment.
Furthermore, it’s important to note that there are visa fee waiver options available for certain individuals. Diplomatic and official passport holders, as well as children under the age of 16, are exempted from paying the visa fee. Additionally, citizens of certain countries may also be eligible for a fee waiver based on bilateral agreements between India and their respective countries.
Before making the payment, it is advisable to check the official website of the Indian embassy or consulate in your country to determine if you qualify for any fee waivers.
Once you have successfully paid the visa fee, you can proceed to the next step, which is scheduling an appointment at the Indian embassy or consulate. This appointment will be crucial for submitting your application and completing the necessary biometric procedures.
Schedule an Appointment at the Indian Embassy or Consulate
After successfully completing the visa fee payment, it’s time to schedule an appointment at the Indian embassy or consulate to submit your application and complete the necessary biometric procedures.
To begin, it is important to check the visa processing times for Surinamese and Eswatini citizens. This will give you an idea of how long the process may take and help you plan accordingly. Keep in mind that processing times can vary, so it’s best to check the official website of the Indian embassy or consulate for the most up-to-date information.
Once you have an understanding of the processing times, you can move forward with scheduling your appointment. Contact the Indian embassy or consulate in your country to set up a date and time for your visa application submission. They will provide you with all the necessary information regarding the documents you need to bring and any additional requirements specific to your nationality.
Before your appointment, it is essential to prepare for the visa interview. Research common interview questions and practice your answers to ensure you are well-prepared. Additionally, gather all the required documents, such as your passport, application form, and supporting documents, to bring with you to the embassy or consulate.
After you have scheduled your appointment and prepared for the visa interview, you will be ready to attend the interview and submit your application. This is the next step in the process, where you will have the opportunity to present your documents and answer any additional questions the consular officer may have. Remember to be confident and honest during the interview.
Now that you have scheduled your appointment and prepared for the visa interview, it’s time to move on to the next section about attending the visa interview.
Attend the Visa Interview
Make sure you are well-prepared and confident for the visa interview, as it is a crucial step in the application process. The interview is your opportunity to demonstrate your eligibility and convince the Indian officials that you intend to visit the country for the stated purpose without any ulterior motives.
Here are some key points to consider when preparing for the interview:
- Research: Familiarize yourself with the visa requirements and understand the purpose of your visit. It is essential to have a clear understanding of the documents you need to present and the regulations you must adhere to.
- Practice: Rehearse your answers to common interview questions. This will help you articulate your responses confidently and concisely. Questions may relate to your travel plans, financial stability, accommodation arrangements, and ties to your home country.
- Dress Professionally: Make a positive impression by dressing appropriately for the interview. Choose formal attire that reflects your seriousness and professionalism.
During the interview, answer all questions truthfully and provide supporting documents when requested. Your demeanor should be polite and respectful. Remember to maintain eye contact and speak clearly.
After the interview, you can transition into the next step of the process, which involves tracking your visa application status.
Tracking your visa application status is crucial to stay updated on the progress of your application. This will help you plan your travel arrangements accordingly and keep any necessary documentation ready for when the visa is approved.
Track Your Visa Application Status
Now that you have attended the Visa Interview, it’s time to track the status of your visa application. This step is crucial as it allows you to stay informed about the progress of your application and know when your visa will be issued.
To track your visa application status, you can utilize the online tracking system provided by the Indian Embassy or Consulate. This system allows you to enter your application number and other relevant details to get real-time updates on the processing of your visa. It’s a convenient way to keep track of your application without the need to contact the embassy directly.
In addition to tracking your visa application, it’s essential to understand the visa application processing time. The processing time can vary depending on various factors, such as the type of visa and the volume of applications received. Generally, it takes around 5 to 7 working days for a visa application to be processed. However, it’s advisable to check the official website of the Indian Embassy or Consulate for the most accurate processing time information.
While waiting for your visa application to be processed, it’s important to be aware of common reasons for visa application rejections. Some common reasons include incomplete documentation, providing false information, insufficient funds, or having a criminal record. To avoid these rejections, make sure to carefully review and submit all required documents, provide accurate information, and meet the financial requirements.
By tracking your visa application status and being mindful of the common reasons for rejections, you can increase your chances of a successful visa application.
Frequently Asked Questions
How long does it take to process an Indian visa for Surinamese and Emaswati citizens?
The processing time for an INDIAN VISA FOR SURINAMESE CITIZENS and INDIAN VISA FOR EMASWATI CITIZENS varies, but it typically takes around 5-7 working days. You will need to provide the necessary documents for the visa application.
Can I apply for an Indian visa on behalf of someone else?
Yes, you can apply for an Indian visa on behalf of someone else. The process duration for the Indian visa application varies, so it’s best to check with the Indian embassy or consulate.
Are there any specific requirements or restrictions for Surinamese and Emaswati citizens applying for an Indian visa?
Surinamese and Emaswati citizens applying for an Indian visa must meet specific requirements and eligibility criteria. They need to provide supporting documents, pay visa fees, and complete the application process. Medical requirements may also apply.
Is there a limit on the number of times I can apply for an Indian visa?
You can apply for an Indian visa multiple times as there is no specific limitation on the number of visa applications. You are free to apply as many times as needed to fulfill your travel requirements.
Can I apply for an Indian visa if I have previously been denied a visa for another country?
Yes, you can still apply for an Indian visa even if you have been denied a visa for another country before. However, the previous denial could be a factor that affects the approval of your Indian visa application.
Conclusion
So there you have it! You now know how to apply for an Indian visa as a Surinamese or Eswatini citizen.
Remember to gather all the necessary documents, fill out the online application form, pay the visa fee, and schedule an appointment at the Indian Embassy or Consulate.
Don’t forget to attend your visa interview and keep track of your application status.
Good luck with your visa application process!