How To Apply Indian Visa For Us Citizen:
Are you a US citizen planning a trip to India? If so, Indian Visa Online Apply. Applying for a visa can sometimes feel overwhelming, but don’t worry, we’re here to guide you through the process.
In this article, we’ll provide you with step-by-step instructions on how to apply for an Indian visa as a US citizen.
First, you’ll need to determine the type of visa that suits your travel needs.
Then, you’ll gather the required documents, fill out the online visa application form, and pay the application fee.
Next, you’ll schedule an appointment at the consulate or embassy for a visa interview.
And finally, you’ll be able to track your visa application status and collect your passport once the visa is processed.
So, let’s get started on your journey to obtaining an Indian visa!
Key Takeaways
- Plan ahead and secure appointment in advance
- Familiarize with visa requirements and practice common interview questions
- Gather and organize necessary documents to support application
- Dress professionally, maintain eye contact, and speak confidently during the interview
Determine the Type of Visa You Need
Now that you’ve decided to embark on this incredible journey to India, let’s figure out what type of visa you’ll need to make your dreams a reality. Determining visa eligibility and understanding visa processing time are crucial steps in this process.
To determine the type of visa you need, start by considering the purpose of your visit. If you are planning to go for tourism, you will require a tourist visa. For business purposes, a business visa is necessary. If you are visiting friends or relatives, you will need a visit visa. Other types of visas include employment, student, and medical visas. Each visa has its own specific requirements and eligibility criteria, so be sure to research and choose the one that fits your purpose of travel.
Understanding the visa processing time is also important. Visa processing times can vary depending on factors such as the volume of applications and the time of year. It is advisable to apply for your visa well in advance of your travel dates to avoid any last-minute complications. The Indian Embassy or Consulate in your area will have information on the current processing times, so make sure to check their website or contact them directly.
Now that you have determined the type of visa you need and have an idea of the processing time, it’s time to gather the required documents.
Gather the Required Documents
To gather the required documents for your Indian visa application, you’ll need to focus on three key points.
First, make sure you have a valid passport with at least six months of remaining validity.
Additionally, you’ll need to provide passport-sized photos that meet the specified requirements.
Next, you’ll need to show proof of your travel itinerary, including your flight bookings and hotel reservations.
Finally, you must demonstrate proof of financial means, such as bank statements or a letter from your employer.
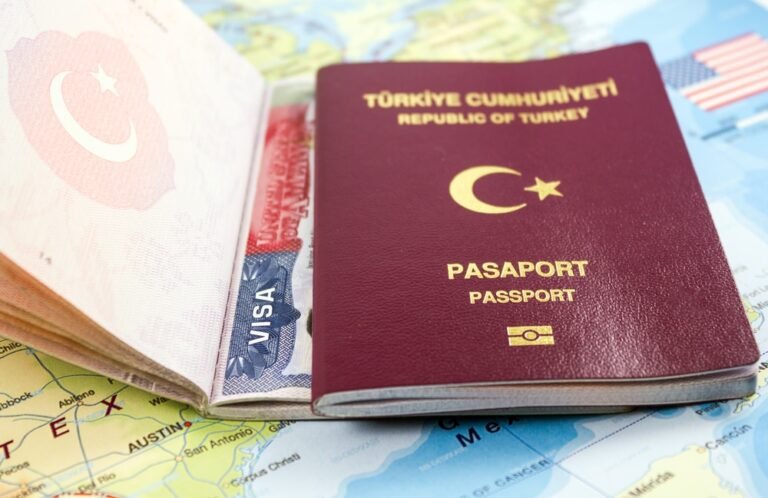
Passport and Passport Photos
When applying for an Indian visa, make sure your passport and passport photos meet the required specifications. To begin, ensure that your passport is valid for at least six months beyond your intended stay in India. If your passport is expired or will expire soon, you will need to go through the passport renewal process before applying for the visa. Additionally, the visa application requires two recent passport-sized photos that adhere to specific guidelines. These guidelines include the size, background color, and facial expression requirements. To give you an idea, here’s an emotional response evoking table:
| Positive | Negative |
|---|---|
| Excited | Worried |
| Adventurous | Anxious |
| Curious | Stressed |
Once you have gathered all the necessary documents, you can move on to the next step, which is providing proof of your travel itinerary.
Proof of Travel Itinerary
Make sure you have a detailed travel itinerary to provide as proof for your trip to India. A travel itinerary is a document that outlines your travel plans, including flight details, hotel reservations, and any activities or tours you have planned. It is essential to have a well-organized and comprehensive itinerary to demonstrate the purpose and duration of your visit to the Indian authorities.
Here are some travel itinerary suggestions to help you prepare:
- Include all your flight details, including arrival and departure times.
- Provide hotel reservations for the entire duration of your stay.
- Mention any planned activities or tours you have booked.
Additionally, it’s highly recommended to have travel insurance coverage for your trip to India. This will not only provide financial protection in case of any unforeseen circumstances but also serve as an additional proof of your travel plans.
Once you have gathered your travel itinerary and insurance information, you can move on to the next section about proof of financial means.
Proof of Financial Means
Ensuring you have sufficient funds available is crucial for your trip to India. To obtain an Indian visa as a US citizen, you need to provide proof of financial means. This includes supporting documents such as bank statements, pay stubs, or a letter from your employer stating your salary.
The Indian government wants to ensure that you have enough money to cover your expenses during your stay in the country. It is important to note that there is no specific minimum amount required, but you should have enough to cover your accommodation, transportation, food, and any other expenses.
Once you have gathered all the necessary documents, you can proceed to fill out the online visa application form. This will be the next step in the process of obtaining your Indian visa.
Fill Out the Online Visa Application Form
To successfully apply for an Indian visa as a US citizen, you need to complete the online visa application form, ensuring that you provide accurate and detailed information. The online visa application process is straightforward, but it is essential to avoid common mistakes when filling out the form. To help you navigate the application process smoothly, here is a table outlining the key information you will need to provide:
| Information Required | Details |
|---|---|
| Personal Details | Full name, gender, date of birth, nationality, and passport details |
| Contact Information | Current address, email address, and phone number |
| Travel Details | Purpose of visit, intended duration of stay, and proposed arrival and departure dates |
| Employment Details | Occupation, employer’s name and address, and monthly income |
| Reference Information | Name, address, and phone number of a reference in India |
Make sure to double-check all the information you enter in the online visa application form to avoid any errors or discrepancies. Providing accurate and detailed information is crucial to ensure a smooth visa application process.
Once you have completed the online visa application form, you can proceed to the next step of paying the visa application fee. It is important to note that the visa application fee must be paid before your application can be processed. By carefully following the instructions and providing accurate information in the online visa application form, you can move forward with confidence in your Indian visa application.
Pay the Visa Application Fee
After completing the online visa application form, the next step is to pay the application fee. This is an important part of the visa application process, as your application will not be processed until the fee is paid.
The fee for an Indian visa for US citizens varies depending on the type and duration of the visa you are applying for. To pay the fee, you have several payment methods available to you.
One of the most convenient ways to pay the visa application fee is through the online payment system. You can use a credit or debit card to make the payment securely. The online payment system is fast and easy to use, allowing you to complete the payment process in just a few minutes.
Another option is to pay the fee at a designated bank. You will need to download the fee payment form from the official website and take it to the bank along with the fee in cash. Once the payment is made, you will receive a receipt which you will need to keep for your records.
Once you have paid the application fee, you can proceed to the next step in the process, which is to schedule an appointment at the consulate or embassy. This step is crucial in order to submit your application and complete the necessary biometric data collection.
Now that you have paid the fee, you can move on to scheduling your appointment and getting one step closer to obtaining your Indian visa.
Schedule an Appointment at the Consulate or Embassy
To schedule an appointment at the consulate or embassy, you need to check the availability of appointments first. Make sure there are available slots that suit your schedule before proceeding.
Once you have confirmed a date and time, it’s important to prepare for the interview by gathering all the required documents and being ready to answer any questions about your travel plans.
Check the Availability of Appointments
The availability of appointments for Indian visas may be limited, so it’s important to plan ahead and secure your spot in advance. To check appointment availability, visit the official website of the Indian embassy or consulate in your area.
There, you will find a section dedicated to visa services, where you can select the type of visa you need and check for available appointment slots. Keep in mind that popular times, such as during the summer or holiday seasons, may have limited availability, so it’s best to schedule your appointment well in advance.
If you need to reschedule your appointment for any reason, you can do so by logging into your account on the embassy or consulate’s website and selecting a new date and time.
Once you have secured your appointment, you can begin preparing for the interview.
Prepare for the Interview
To prepare for the interview, there are a few steps you can take. First, familiarize yourself with the visa requirements and practice common interview questions. This will help you feel more confident and prepared on the day of the interview.
Here are some tips to help you with your interview preparation:
- Research the Indian visa requirements thoroughly to ensure you have all the necessary documents.
- Practice answering common interview questions such as your purpose of visit, duration of stay, and financial stability.
- Dress professionally and present yourself in a polite and respectful manner during the interview.
- Stay calm and composed, and maintain eye contact with the interviewer.
- Be honest and concise in your answers, providing relevant information without unnecessary elaboration.
By following these interview preparation tips, you will be well-equipped to attend the visa interview and increase your chances of a successful visa application.
Now, let’s move on to the next section about attending the visa interview.
Attend the Visa Interview
Prepare yourself for the nerve-wracking yet crucial visa interview, as it holds the key to your incredible Indian adventure! To ensure a successful interview, thorough visa interview preparation is essential.
Start by understanding the purpose of the interview, which is to determine your eligibility for an Indian visa. Familiarize yourself with the common interview questions that may be asked, such as the purpose of your visit, duration of stay, and financial capability. Be prepared to provide detailed and honest answers that align with your visa application.
In addition to practicing potential interview questions, it is crucial to gather all necessary documents to support your visa application. These may include your passport, visa application form, invitation letter, proof of accommodation, travel itinerary, and financial documents. Organize these documents in a neat and easily accessible manner to present them confidently during the interview.
On the day of the interview, dress professionally and arrive early to avoid any unnecessary stress. Remember to bring all required documents and keep a calm and composed demeanor throughout the interview. Maintain eye contact with the consular officer and speak clearly and confidently when answering questions.
Once the visa interview is complete, transition into the subsequent section by discussing the next steps in the process. After the interview, you can track your visa application status online and collect your passport once the visa has been approved. This final step will mark the end of the application process and the beginning of your exciting journey to India.
Track Your Visa Application Status and Collect Your Passport
After attending the visa interview, it’s time to track your visa application status and collect your passport. This is an essential step in the process of obtaining an Indian visa for US citizens.
By tracking your visa application, you can stay updated on the progress and know when to expect your visa to be approved. Here are four steps to help you track your visa application and collect your passport:
- Visit the official website: Go to the designated website for tracking visa applications. Enter your application number and other required details to access the status of your application.
- Check the status regularly: Once you have logged in, you will be able to see the current status of your visa application. Keep checking the website regularly to stay informed about any updates or changes.
- Contact the embassy or consulate: If you encounter any issues or have specific questions regarding your visa application, reach out to the Indian embassy or consulate for assistance. They will be able to provide you with the necessary information and guidance.
- Collect your passport: Once your visa application is approved, you will receive a notification to collect your passport. Follow the instructions provided by the embassy or consulate to retrieve your passport, which will now contain your Indian visa.
Tracking your visa application and collecting your passport are crucial steps in the process. By staying informed and following the necessary procedures, you can ensure a smooth and successful experience in obtaining your Indian visa.
Frequently Asked Questions
Are there any specific requirements or restrictions for US citizens applying for an Indian visa?
To apply for an Indian visa as a US citizen, you need specific documents like a valid passport and visa application form. Currently, there are no travel restrictions for US citizens visiting India.
Can I apply for an Indian visa online or do I need to visit the consulate or embassy in person?
You can apply for an Indian visa online without visiting the consulate or embassy in person. The online application process requires you to submit the necessary visa application documents through the official website.
How long does it typically take to process an Indian visa for US citizens?
Typically, it takes around 3-5 business days to process an Indian visa for US citizens. You will need to provide the required documents such as a valid passport, visa application form, and a recent passport-sized photo.
Is it possible to expedite the visa application process for urgent travel plans?
Yes, it is possible to expedite the visa application process for urgent travel plans. You can apply for expedited visa processing, or consider alternative visa options like the e-Visa or Visa on Arrival.
Are there any additional fees or charges that I should be aware of when applying for an Indian visa as a US citizen?
When applying for an Indian visa as a US citizen, there are a few things to keep in mind. You may need to provide additional documents and be aware of the visa application fees.
Conclusion
So, now you know how to apply for an Indian visa as a US citizen! Here’s a step-by-step guide to help you through the process:
- Determine the type of visa you need and gather all the required documents.
- Fill out the online application form. Make sure to provide accurate and complete information.
- Pay the application fee. The fee can be paid online using a credit or debit card.
- Schedule an appointment at the consulate. You will need to visit the consulate in person for a visa interview.
- Attend the visa interview. Be prepared to answer questions about your travel plans and provide any additional documents if requested.
- Track your application status. You can do this online using the reference number provided to you during the application process.
- Once your visa is approved, you can collect your passport from the consulate. Make sure to check the collection process and timings.
- Start planning your trip to India! Now that you have your visa, you can start making all the necessary arrangements for your travel.
Remember to double-check all the requirements and follow the instructions provided by the Indian consulate to ensure a smooth visa application process.